Discover how to customise the system by adding your company logo and colours
Last Updated: 14/11/2024
What's covered:
Setting up your organisation's branding
How to find the branding settings
Editing colours, cards and buttons
Setting up your organisation's branding
Administrators can customise key branding elements across the system, including the company logo, colours, and tiles. This allows you to make everyday feel like an extension of your company and creates a seamless onboarding experience for your employees.
How to find the branding settings:
- Navigate to the Settings tile from the main menu
- Click on the settings dropdown menu and select Branding
-
Select the Branding tab to edit your company logo and change the system colour scheme

How to brand the system
Make the system truly yours by personalising the look and feel via the Branding page. Here’s what you can customise:
- System Name and Imagery – Upload your company logo to display in the page header.
- Core Colours – Define the colours for Negative, Positive, Warning, and General messages and statuses.
- Fonts and Text Colours – Customise heading colours to match your brand’s style.
- Headers and Backgrounds – Adjust background colours for both light and dark mode to create the perfect theme.
- Cards – Modify card colours and fine-tune the corner curvature for a sleek, modern look.
- Buttons and Inputs – Personalise button and input box colours, including borders and backgrounds.
With these options, you can create a visually cohesive experience that aligns with your brand identity.
Adding your company logo
Your company logo is displayed in the top left corner of the system, next to the tile menu button.
- Expand the System Name and Imagery section
- Click Upload New Image
- Select your formatted logo and press open
- The new logo will show in the preview box
- Click Save Changes to apply them to the system
- Refresh the page to see your new logo
- Repeat the steps above for your inverse logo (which displays in dark mode)
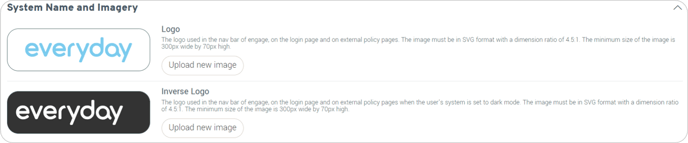
Logo image specifications
- Aspect ratio: 4.5 : 1 (width to height)
- Minimum size: 300px (width) × 70px (height)
- File format: .png or .svg
Editing colours, cards and buttons
Other branding options allow you to personalise your system's colours, button styles, and backgrounds. Adjust these components to align with your organisation's brand for a seamless and unified experience.
- Expand the relevant section under the options heading (e.g. Buttons)
- Click on the colour selector circle on the left
- Select the colour (or type in the RGB / HSL / HEX code)
- Click Save changes
- Refresh the page to see your new colours
You have the option to choose up to three alternative colours for your navigation bar headings in the Headers and Backgrounds section or you may choose to customise the corners of cards, buttons, and input boxes in those respective areas.
When adjusting colours in each section, you can either enter the RGB, HSL, or HEX code manually or use the colour selector to match colours used on other pages. If you need to switch to another page while selecting colours, simply press the Esc key to remove the magnifying glass and resume normal mouse functions.

Once you are happy with your customisation, save your settings to apply them throughout the system. Be sure to review different parts of the platform to confirm that your changes align with your preferences.
After saving your branding settings, navigate through different sections of the platform to ensure the changes are applied correctly. Periodically revisit the branding settings to adjust as needed, especially when there are changes in your organisation's branding guidelines.